Friday, July 15, 2016

Well, it has been a while since I could work on the boat. There was some major house renovations and my daughter was married w/ everything happening at the house but I finally had a chance to start working on the hull. I had the hull sanded but I needed to raise it up to remove the bottom paint. I used the rack system found at the SanJuan 21 class site (http://www.sj21class.org/phpbb2/viewtopic.php?f=16&t=230). This was working well until one of the front forms slipped along the ground and the boat dropped catching my left hand. It amputated one of my fingers and completely smashed my thumb. The stitches come out today. Needless to say this is the end of my project boat. I am not going to donate any more body parts. If I contiue to sail,  it will have to be in a boat that does not need major work.


This system worked well  (until it didn't). I think the problem was that there was a slight down slope towards the front and the slope of the hull slowly pushed the forward beam outwards. I was actually finishing for the day and lowering the boat down when it collapsed. If you guard against slippage then I still feel this system would work well. The bottom picture is all the parts for the forms. I made them using bolts so it would fold up to be used for another time (though since losing a finger and possible thumb there will be no next time for me.). I hope this blog has been useful for some. I will be selling my boat so if anyone near central Pennsylvania is interested please contact me through this blog.

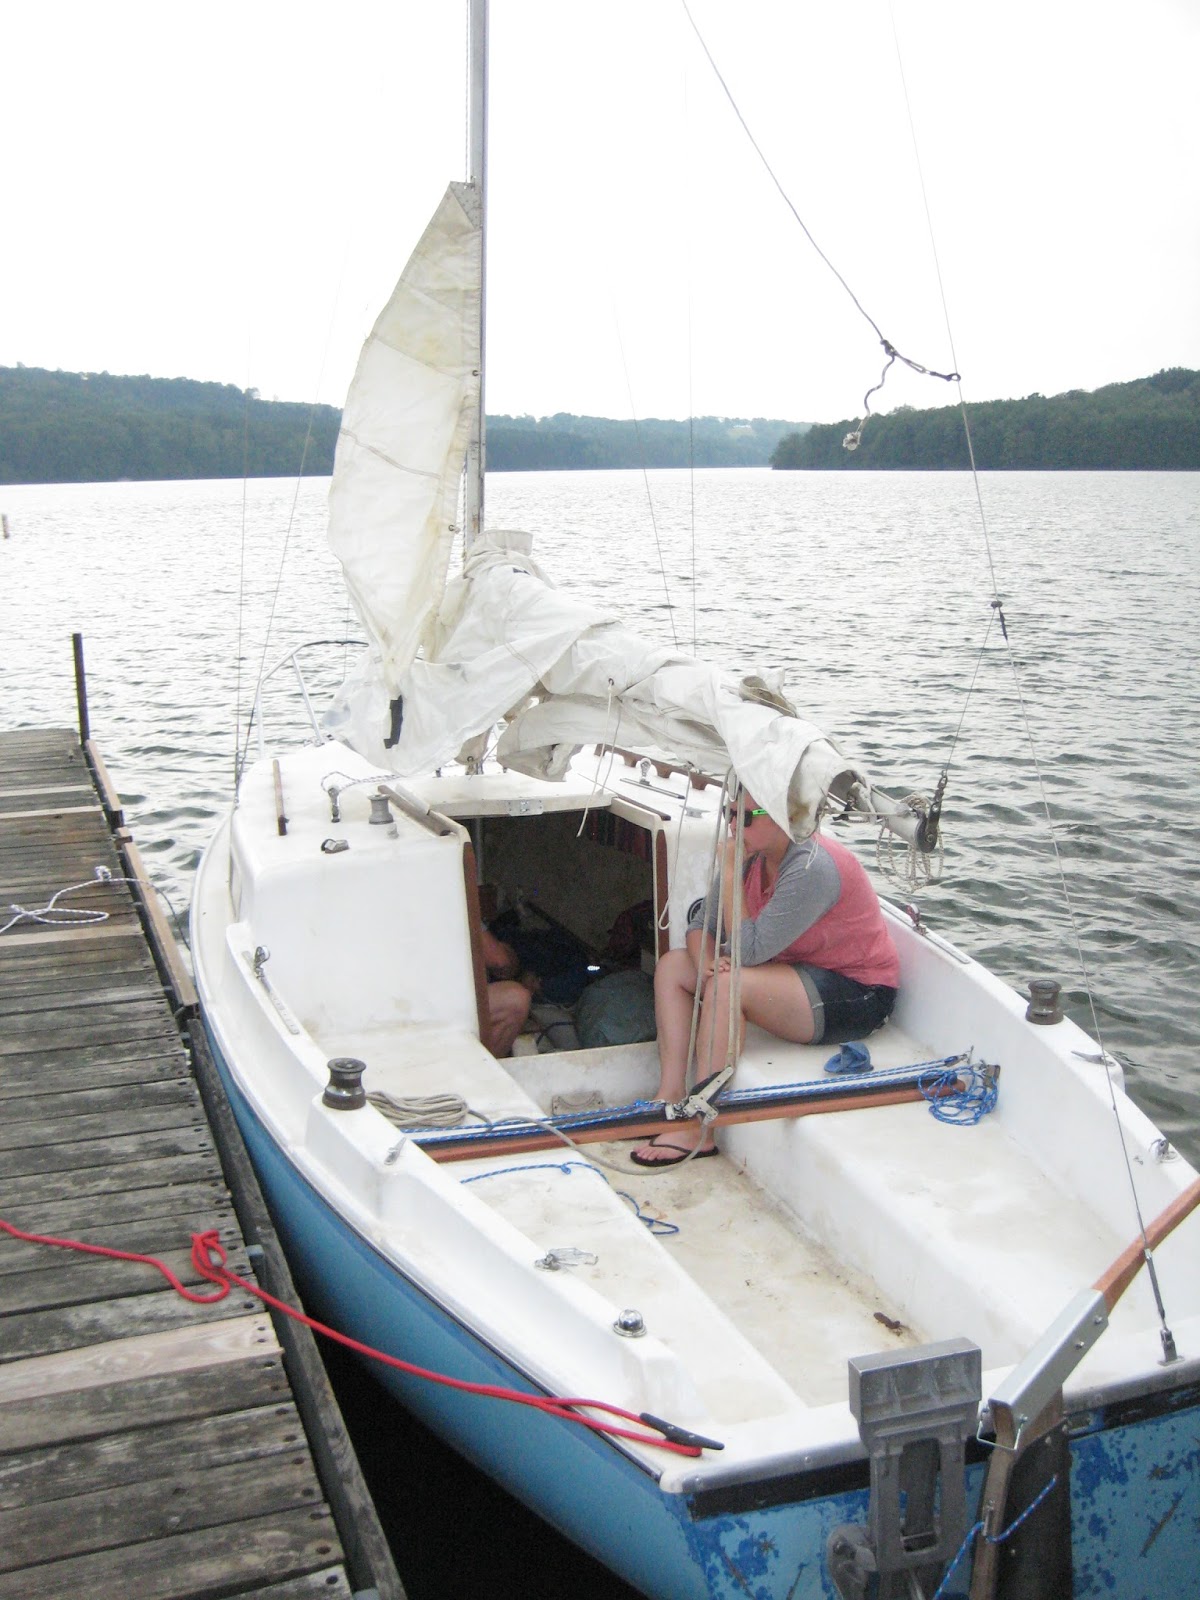
The SanJuan 21 is a great boat for its size and I am sorry to give it up. I hope someone will enjoy getting it back to the water.

Tom Schaeffer

Wednesday, October 29, 2014

Since my boat is in the water I have had a chance to spruce up the trailer. I had done the front lift mechanism in 2011 so now I am ready for the rest of it. It was structurally sound but the springs needed replacing and it was rather rusty. I used a 4 1/2" grinder w/ a wire wheel attached and it took the rust down fairly easily. I used a rust preventing paint "Chassis Saver". This is used by the local loggers in their logging trucks. I had used it of the front tilt part of the trailer and it worked great. It goes on with a gloss finish but once out in the sun it turns dull. It sticks to anything. In fact I made the mistake of not cleaning out the rim of the paint can and I had to cut the lid off because it was stuck so hard. the local auto body paint shop owner who recommended this told me I didn't even need to take the rust off - I could just paint over it but I figured I should at least make it flat. I developed a nasty tennis elbow problem from grinding all day
You can see there was some serious rust on the frame. But after grinding and painting it looks great!

You can see the rollers were in rough shape - I replaced all of them and added one to the front cross strut
I could not find replacement springs that fit the brackets so I had to use slip springs and bolted the new rear hanging bracket to the frame. The new springs pull the axle center slightly aft so I was a little concerned that when the boat was loaded onto the trailer the fender will rub the tire. Turned out I did not have to worry. I picked up the boat and it worked great. the next step will be to finish the hull. I hope to sand down the entire hull then paint on new bottom paint and finish it above the water line. I would like to remove all the hardware but I am not sure I can reach the bolts for the motor mount. I have secured a barn to do the work and hope to have done before May 1, 2015 when the lake opens again. I will document my efforts as always in this blog.

Happy sailing,

Tom


Monday, August 18, 2014

My apologies for the long delay between posts but I have had a lot of projects at the house demanding my attention. I purchased a dock space this year instead of keeping it on the trailer. It is so much easier. The season at my local lake is May 1 through October 31 (all boats have to be off the water in the off season). I didn't get the boat in the water until July. My plans were to repaint the hull before putting it in but if I waited for that I would never get it in the water. The paint job will have to wait even though as you can see she is in desperate need.

 I also obtained an outboard. I had an old 3.5HP Mercury but I twisted the carburator jet and broke it. Apparently this item is not stocked any more and I could not find a replacement. I found a 6HP Evinrude for $400 that runs great. It came w/ a separate gas tank but I felt it would take up too much room so I bolted on a lawnmower tank to the cover. this works great. The only time I need it is leaving the dock and coming back in so the 1/2 gallon of gas it holds is plenty.
 I decided to put up a wind vane on the mast so I had to lower the mast and screw it on. This was a $15 item I found on Amazon (some of the windvanes are very expensive!). It screws onto the mast head and works great.


 I have a slight leak somewhere. There is always a 1/2" of water in the bilge. This fall when I pull it out I will have to inspect the hull. My suspicion is that it is coming in via the keel pocket somewhere.

The next big project is to rehab the trailer. Now that the boat is off of it I will need to grind off the rust, replace all the rollers and probably put on new springs. I will chronicle all this over the next few entires.

Happy sailing,
Tom


Monday, September 9, 2013

I have been sailing three times now and have been getting used to the boat. The first time I put her in the water the carpeting on the trailer runners just fell apart. On close inspection it seems the carpet was not even outdoor carpet but regular indoor carpet (You can see pieces of it on the fender). I found some outdoor carpet remnants at a local carpet store for $0.79/sg foot so it was about $20 for both runners. So far the boat has handled well. the sails need some serious cleaning. They are a bit stretched out but will suffice for now. Note the knotmeter - 6 knots in a light breeze. The tilt up rudder is a bit stiff. i think I will have to loosen some bolts on the head plates to get it to swing a little easier.

Tuesday, September 3, 2013

I finally put the boat in the water and everything went well (it did not sink). I even had a stowaway (mouse). The keel worked well as did the rudder. I think my main is a bit stretched out of shape or at least the stop on the mast is too high. I am thinking of lowering the stop to see if the main can be pulled tighter. The outhaul seems to be at it's furthest but there is still a lot of slack in the main. The jib worked well. I have not tried the genoa yet. The season for my local lake lasts until October 31 so I plan on sailing as much as I can until then. The carpet on the trailer runners fell to pieces after they became wet so I will have to replace them.

Sunday, August 18, 2013

Well it's the big push to get the boat into the water. I found it much easier to raise the mast single-handed if I used the two port winches to pull the line attached to the jib halyard. I am planning on sailing Labor Day Monday (Sept 2, 2013). I pressure washed the mildew and grime off the deck and washed the cabin area which was way more work then I would have liked. There was mud, old hornet nests, mud daubbers nests and beer cans stuck way up in the aft end. I replaced the halyards w/ new rope but I just used cheap rope from Lowes for now. I did not want to spend the $$ on good line until I knew the boat sailed or at least floated. I replaced the board the traveler sits on w/ a piece of composite decking I had laying around. It worked well. I seated the board w/ silicone for now because I plan on removing it next year for a paint job. I used stainless steel #10 2" bolts w/ nylon locknuts underneath.I added aluminum backing plates which I made from stock aluminum bar.
Tractor Supply sold the aluminum. I used a bar that was 1/8"x2"x36" for $12.99 then cut it into 5" pieces for the backing plates. The original backing was 1/8" plywood which was flaking apart. While I was laying on my back looking up I noticed there were several fittings that had no backing plates. I can't imagine this is a good idea and plan on adding backing plates to all the fittings but that will have to be another day. I was looking at the wiring in the boat. I have no idea where the battery is usually stored. If anyone can shed some light on this I would appreciate it. There are several areas where wires disappear into the fiberglass and I am not sure how all this goes together. There is a main switch board. For now I do not plan on sailing at night but I am sure that will come. If anyone has ideas about how this wiring works I would appreciate your help so I am not reinventing the wheel.In the forward section there is a lower compartment that is covered by two plywood doors. In this compartment is a round plastic fitting where a wire goes into. The fitting is havily caulked w/ silicone (sloppy job at best). The wire from the fitting disappears into the wall of the box which is below the plywood cover. I am assuming this is the speed indicator relay. The only instrument on the boat is a speed indicator located topsides on the straboard wall next to the cabin doorway. The next step is to check out the outboard. I have an ancient 4HP outboard but it is standard length. I hope to be able to rig up something w/ the motor bracket that came w/ the boat so I can use it. I do have a paddle but I would like to use the motor if possible. I can't see buying a long shaft motor until I am sure the boat is sea worthy. Once all the grime was off the deck I could inspect the paint job done by the previous owner. It was a poor job w/ paint drips and puddles. The fittings were not removed either. Next year I plan on removing all the hardware and stripping off the paint and starting from the fiberglass. I am not sure what to do with the anti-slid areas. These were painted over. I am thinking I will have to use chemical paint remover or I could sand it down flat and add grit to the paint in those areas for anti-skid action.